familyfoodfriends.net
FAMILY FOODFRIENDS.NET
  • Home
  • Family Photo's
  • Blog
  • Contact
  • Photos of Friends
  • Recipes
  • Misc Photo's

Apple Butter my way

10/21/2015

1 Comment

 
Picture
Picture
Picture
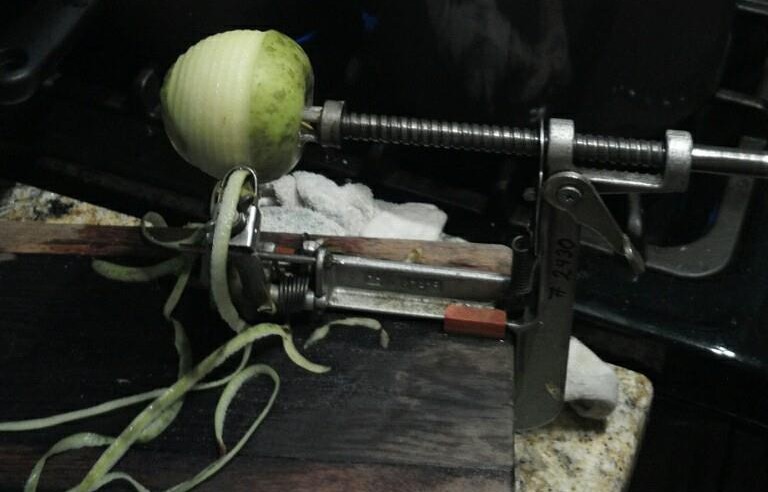
This happens to be one of my kids favorite things. The hardest part is peeling the apples.
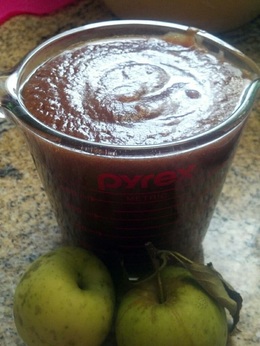
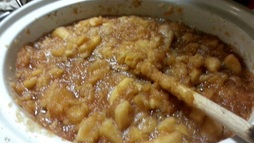


APPLE BUTTER
3lbs of cored peeled chopped apples
1/2 tsp cinnamon
1/16 tsp ground nutmeg
1/16 tsp ground cloves
1/16 tsp ground all spice
1 cup brown sugar
1/2 cup of apple juice.

I usually double the recipe

Place all in a ingredients in a large crockpot and cook over night.
I go light on the spices cause I wanta taste the apple not just spices. I stir the pot ever so often and shake off the water that has built up on the lid to help thicken the butter.

I then can the butter or store in frig.
Fill hot butter into sterile half-pint, leaving ¼-inch headspace. Place sterilized rings and lids on jars. Recommended process time for Apple Butter in a boiling-water canner.   Process Time at Altitudes 0 - 1,000 ft  is 5 minutes 1,001 - 6,000 ft is 10 minutes Above 6,000 ft 15 minutes

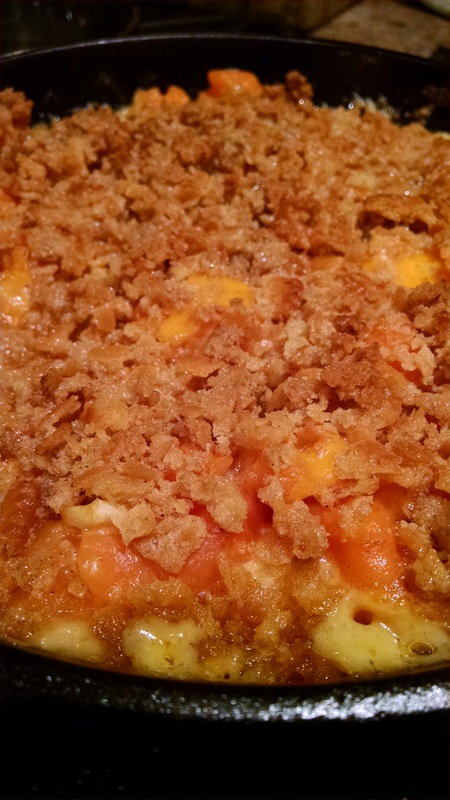
You can use the butter to make apple butter dumplings by just dropping your favorite dumpling recipe into the hot butter you have placed in a pot and the stove and brought to simmering butter.


Picture
1 Comment

Pimiento Cheese Spread

10/1/2015

0 Comments

 
Picture

1/3 cup mayonnaise
1 oz cream cheese (room temp)
1/3 cup chopped pimiento (used pickled sweet red peppers)
3/4 tsp Worcestershire sauce
1 cup grated Sharp  Cheddar cheese

I like my spread chunky not smooth so I don't us a food processor but you are welcome to do that. Put mayo & cream cheese in a small bowl. Blend until smooth. Add remaining ingredients and combine until smooth.

Picture

Being raised in the south Pimento sandwich were a staple at showers and weddings. You can't get much more southern then this.

Picture
You had to cut the crust off the bread.
Picture
Picture
Then cut the sandwiches in to numerous shapes. Rectangles. triangles and even squares were acceptable.
0 Comments

Red Velvet Cake 

8/22/2015

0 Comments

 
Picture
 This has to be my second favorite cake only falling behind the Slice of Heaven Cake. It is Chocolate so it has to be good. The icing is like no other.

1/2 cup coconut                                                red food coloring
1/2 cup shortening                                          1 1/2 cup sugar
2 eggs                                                                     2 oz red food coloring
2 Tbs cocoa                                                         1 scant tsp salt
2 1/2 cup sifted all purpose                         1 tsp baking soda  
1 cup butter milk                                              1 tsp vanilla                             1 Tbs vinegar

Preheat oven to 350 degrees. In a small bowl mix coconut and a few drops of red food coloring. Toss until coconut is covered. Set aside. Grease and flour 3 9" round cake pans and set aside. In a large bowl cream shortening, sugar and eggs together until sugar is no longer grainy. In a cup combine cocoa & 2 oz of red food coloring until a paste. Add this to sugar mixture. Add salt.  Combine buttermilk and vanilla. Alternate adding flour & butter milk mixture. Stir don't beat. Then add 1/3 of soda and vinegar until all is added. Pour into prepared cake pans and bake for 30 minutes in preheated 350 degree oven for 30 minutes or until toothpick inserted in the center comes out clean. Top with Red Velvet icing


Red Velvet Icing

3 Tbs flour                                                        1 cup shortening
1 cup milk                                                         1 tsp vanilla
1 cup sugar

In a small pan combine flour & milk. Blend until smooth. Cook on low heat until thick. Remove from heat and cool. (I have been known to place mine in the freezer to cool off faster.) In a large bowl combine shortening and sugar and cream. Add in flour mixture and blend in vanilla. Spread over cooled cake and top with colored coconut.


0 Comments

Banana Nut Bread

7/8/2015

0 Comments

 
Picture
One of my favorites things to make is banana nut bread. What usually warrants me making bread is bananas the have gotten to ripe for me to eat.  Every time I make it it makes me think of 2 people. My Mom who's recipe I just tweeted to make it mine and my PawPaw Achord who LOVED over ripe bananas. Me & my daughter LOVE bananas that are a little green. I would never get to make bread if he was still around. The bread is better the next day. One of my favorite was to serve the bread is with cream cheese. Take and warm the bread for a few seconds in the microwave and slather the cream cheese and dig in.

Picture
1/2 cup butter                                                     2/3 cup milk
1 Tb lemon juice                                                 1 tsp salt    
2 1/3 cup all purpose flour                           1 3/4 cups sugar
1 1/2 tsp baking powder                                 1 1/2 tsp baking soda
3 eggs                                                                      1 Tb honey
2 -2 1/4 cup mashed bananas                      1 tsp vanilla 
2/3 cup pecans

Spray 2 regular size loaf pans or 18 mini pans with Pam. Soften butter, but NOT liquid and place in a large bowl. In a measuring cup place milk Stir until smooth. Measure dry ingredients and set aside.  Place  eggs, honey, bananas and vanilla into softened butter. Alternate adding and beating in dry ingredients & milk mixture. When combined beat on high for 3 minutes. Fold in pecans. Pour into pans and bake 45 to 50 minutes 25 minutes for mini loafs.

0 Comments

Cheesey Carrot Casserole

6/12/2015

0 Comments


I received this recipe from Sue Kay Smith after tasting it at one of The Women of the Moose dinners at the lodge in Plymouth Indiana. When I asked her if she would share her recipe, she whipped out of her purse a sheet of the recipes. I guess I wasn't the only one who liked her recipe. LOL Apparently there had been request the last time she made it.

By Ginny McCormick 
(Sue Kay Smith’s Aunt)

1 pkg carrots
(1 lb whole carrots)

1 chopped onion.

1 tlb sugar

1 cup grated sharp cheddar cheese

¾ cup Mayonnaise

1 stick melted butter

1 crumbled sleeve Ritz Crackers

Salt to taste
(I like creole seasonings)

Boil carrots for 15 minutes. Slice and place in a casserole dish. Add onion, sugar, cheese, mayonnaise and combine. Combine butter & crackers and sprinkle top of casserole. Bake at 350º for 20-25 minutes. 

Picture
Picture
I used 1 small bag of the baby carrots & halved the recipe. I also used light Blue Plate Olive Oil Mayonnaise when I made it as well. It wasn't quite as good as hers but still good. Trying to watch our fat intake and olive oil is good for you. (at least that is what they say today who knows what tomorrow holds LOL) When I make it next time I will use regular mayonnaise.
Picture


I chopped the carrots into 1/4" bites.

Picture


Place carrots in a pot and covered with water. I placed a pat of butter in the water and boiled for 15 minutes or until tender.

Picture


While carrots were cooking I melted the remaining butter in the skillet I was going to bake the carrots in. (I used 1/2 a stick in halfed recipe. I had put a pat from that 1/2 a stick in the carrots when boiling.)

To make the topping I crushed the crackers while still in the package by pressing down on the top and compressing the sleeve.
Picture
Place 1/2 of a sleeve of the crackers in a bowl with the melted butter and set aside for the topping
Picture
Picture
Grate cheese & set aside.


Chop onion and placed in the skillet that I melted the butter in. There is just enough left in the skillet after pouring in the crackers.
Picture
Picture


Saute' onions until translucent.
Drain carrots when tender and place into the skillet along with onions, mayonnaise, salt and sugar. Stir to combine. When combined add 2/3 of the amount of cheese and stir leaving a small amount for topping.
Picture


When combined smooth out the ingredients so that you can place toppings.
Picture
Picture
Picture


Sprinkle remaining cheese over carrot mixture.


Sprinkle butter Ritz cracker mixture over the top of cheese.
Place in oven and bake for 350 degrees.
Picture
Picture
Enjoy!!!
0 Comments

MawMaw Lena's Pecan Pie

5/6/2015

0 Comments

 
Picture
This has to be our families FAVORITE pie!! It is sooooo good that my son and husband always asked for this from my Mom as their birthday present
3 eggs                                    1 tsp vanilla          
1 cup sugar                         1/4 tsp salt
1 cup Karo Syrup              2 Tbs. butter
1 cup pecans                       1 unbaked pie shell
Preheat oven to 350 degrees F. In a large bowl combine eggs and sugar and blend until sugar has begun to melt. Add Karo syrup, and butter and beat with a whisk. Add vanilla and pecans and then pour into unbaked pie shell. Bake 45-60 minutes or until   center reaches 200°F. Tap center surface of pie lightly - it should spring back when done.  If pie crust starts to get too brown cover edges with foil.
Our family's favorite way to eat this pie is with vanilla ice cream and a big glass of milk. Hope you enjoy and share it with friends
Picture
Picture
0 Comments

Grits Grits Grits

4/14/2015

0 Comments

 
Picture
Picture
Grits are a staple in a southern home. They are very versatile. from plain to cheese to cakes and my husbands favorite tomato grits. I've even seen a few in Florida eat them like cream of wheat with milk and sugar. 

There is a secret to making perfect grits.
2 cups water                                            1/3 cup quick grits
1/2-1 tsp of salt                                      fresh ground pepper
butter

Place water in a small pot and bring water to a boil. Sprinkle grits into boiling water and stir immediately until combined and no lumps. Sprinkle salt & pepper to taste.  You will cook them for about 20 minutes. THEN and only then add your butter at the end. Then you can serve as one of the above pictures with sausage that has been skillet sauteed with caramelize onions with drippings.
0 Comments

Yes I have an addiction!!

3/13/2015

0 Comments

 
Picture
I LOVE Cookbooks!!! I now have so many that I have to limit myself to only vintage cookbooks & recipe boxes. I even love to collect hand written recipes. My pride and joy is the Better Home and Garden cookbooks. I have been known to take a cookbook to bed and read. I take what I read and add my own twist to any recipe I make. Another of my favorite collection is the Southern Living Annual cookbooks. The contain all the recipes for that perspective year.

0 Comments

My Momma's Potato Soup

1/21/2015

0 Comments

 
Picture
This is my Momma's recipe. She would make this a couple times each winter. It is the best I have ever eaten. This past Christmas I made a large batch and canned this. I must say it canned very well.

You will need:
8 slices bacon                                 1 cup celery
1 cup onion                                     4 cups diced potatoes
1 can cream of chicken soup   1 can cream of mushroom soup
2 cups water                                    1 1/2 -1 3/4 cup milk (to thin soup)
8 oz sour cream                              2 Tbs parsley
salt                                                       pepper
grated cheese                                  oyster crackers

In a large pot, fry bacon until crispy and remove bacon leaving some grease in the pot. Crumble bacon and set aside. Add celery and onions to the pot and saute' until tender. Add potatoes and water and simmer until potatoes are tender, Add soups and rinse out cans with mild and add to pot. Dimmer until heated through. Just before serving add sour cream and parsley. Salt and pepper to taste. Serve with cheese and crackers
0 Comments

A Slice of Heaven Cake

12/19/2014

0 Comments

 
Picture
This is my all time favorite cake. It is my version of the Berry Chantilly Cake at Whole Foods in Baton Rouge Louisiana. I have bought this cake more times then I can count. I have bought just a slice for me or whole cakes for birthdays and Baby showers. I loved it so much I had to try to figure it out so I could make it on my own. It is the one I made for my daughters wedding. Everyone who has eaten this cake loves it too. If you don't have time for this cake you can make the Jello Cake  by clicking on the link but using apricot jello and it will taste good too. 

Step 1 Cake:
Cooking Spray with Flour
1 1/2 cups cake flour                               2 1/2 teaspoons baking powder
1 teaspoon salt                                           3/4 cup butter, room temp    
15 ozs whole milk ricotta cheese        1/2 cups sugar, plus 1 tbl    
4 large eggs                                                   1 teaspoon vanilla extract         1 orange, zested                                          1 Lemon,  zested                            2 tablespoons Amaretto

    Preheat the oven to 350 degrees F. Spray three 8’ pans with Cooking Spray with Flour.  In a medium bowl combine the flour, baking powder, and salt. Stir to combine.
    With an electric mixer, cream butter, ricotta, and sugar until light and fluffy, about 3 minutes. With the machine running, add the eggs 1 at a time. Add the vanilla, orange zest, and Amaretto until blended. Add the dry ingredients, a small amount at a time, until just incorporated.
    Pour the mixture into the prepared pans and bake until a toothpick comes out clean and the cake is beginning to pull away from the sides of the pan, about 20 to 25 minutes. Let the cake cool in the pan for 10 minutes then transfer to a wire rack to cool completely.
    While cake is baking start apricot glaze.

 
Step 2:
Apricot Glaze:
1 cup water
1/2 cup sugar
1/2 cup apricot jam or preserves
1-3 tablespoon Grand Marnier

 In a small saucepan heat water and add sugar until syrup has thicken slightly. Add apricot jam or preserves into saucepan over medium heat until melted. Remove from heat. At this point you can strain the sauce through a fine strainer to remove any fruit lumps or if desired you can leave glaze as is. I prefer to divide a small amount out without fruit to glaze top of fruit. Let cool slightly (if using, add the liqueur at this point) until it is only slightly warm. Glaze the top each cake with unstrained sauce, using a pastry brush. Set cakes aside.

Step 3:
FRUIT LAYER & Top:
Strawberries     Blueberries
Raspberries       Blackberries

Step 4:
RASPBERRY PUREE:
2 pints raspberries
1/4 cup sugar
1 tablespoon lemon juice

1.Combine raspberries and sugar in a saucepan. Cook until raspberries are broken down, about 10 minutes.
2.Remove from the heat and strain through a strainer to eliminate seeds.

Step5:
CHANTILLY FROSTING:

16 ozs cream cheese, room temperature
1 1/2 teaspoon pure Almond extract
2 ½ cups confectioners' (icing or powdered) sugar, sifted
16 ozs  Mascarpone cheese, room temperature
3 cups heavy whipping cream

    In your food processor, or with a hand mixer, process the cream cheese and mascarpone cheese until smooth. Add the extract and confectioners sugar and process until smooth. Transfer this mixture to another bowl.
    Then in a large bowl whip the cream until stiff peaks form. With a large spatula, gently but quickly fold a little of the whipped cream into the cream cheese mixture to lighten it. Then fold in the remaining whipped cream, in two stages. If the frosting is not thick enough to spread, cover and place in the refrigerator for an hour, or until it is firm enough to spread

Step 6:
ASSEMBLY

Place one completely cool layer of glazed cake on a cake dish and add frosting to top. Frosting should be slightly higher near edges than in the center. Add raspberry puree to layer then add a layer of sliced fruit. Continue with remaining layers. (Piping frosting at the edge will help to keep the raspberry puree from running down the sides.) Frost the entire cake with Mascarpone frosting. At this point you can add piping to the top rim of the cake as well as the sides if you like. At this point top the remaining whole fruit.  While the apricot glaze is still warm brush the fruit with a thin layer. Place the cake in the refrigerator until ready to serve. This cake is best served cold.

0 Comments
<<Previous

    Archives

    September 2017
    January 2016
    December 2015
    October 2015
    August 2015
    July 2015
    June 2015
    May 2015
    April 2015
    March 2015
    February 2015
    January 2015
    December 2014
    November 2014
    October 2014
    August 2014
    July 2014
    May 2014
    April 2014
    March 2014
    February 2014
    November 2013
    October 2013
    July 2013
    January 2013
    December 2012
    March 2012
    February 2012
    December 2011

    Author

    My name is Stephanie Thomas. I am a Louisiana girl who has transplanted to Indiana. I LOVE to cook, take photos, raise chickens, ride motorcycles, a quilter and did I mention cook?  I have cooked in my friends cafe's and for church events.  I have a 20 gallon pot of jambalaya that I have used to cook for our party that we have every year for our friends. I enjoy cooking for our family and friends.

    Categories

    All
    Breads
    Breakfast
    Cakes
    Canning
    Casserole
    Crafting
    Desserts
    Dips & Spreads
    Entree
    Just Me
    Meal In It Self
    Mexican
    Old Recipes Card Or Clippings
    Pies
    Quilt Square
    Recipes
    Sandwickes
    Sewing
    Smart Tips
    Snack
    Soup

Powered by Create your own unique website with customizable templates.
  • Home
  • Family Photo's
  • Blog
  • Contact
  • Photos of Friends
  • Recipes
  • Misc Photo's