familyfoodfriends.net
FAMILY FOODFRIENDS.NET
  • Home
  • Family Photo's
  • Blog
  • Contact
  • Photos of Friends
  • Recipes
  • Misc Photo's

Jello Cake

12/15/2014

0 Comments

 
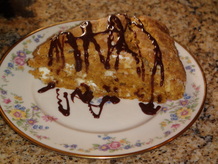
This was my Mom's go to dessert. It was made many times for dinner on the ground at church. It is one of the most moist cakes ever.  You can put a glaze on it but most of the time we would eat it straight out of the oven. You can use this with a package of apricot jello and use it in the Slice of Heaven Cake recipe if you are running short on time or ingredients.  I will post it in a day or two. I promise you will love this cake. It is one of the few cakes my husband likes because he is not much of a cake eater. Try it and let me know what you think.
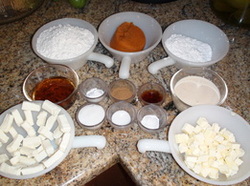
1 cake mix
1 pkg. (3 oz.) Jello, Any flavor
2/3 c. water
2/3 c oil
4 eggs

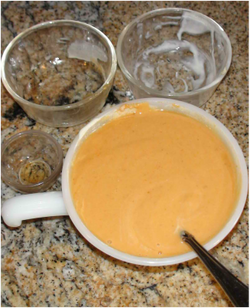
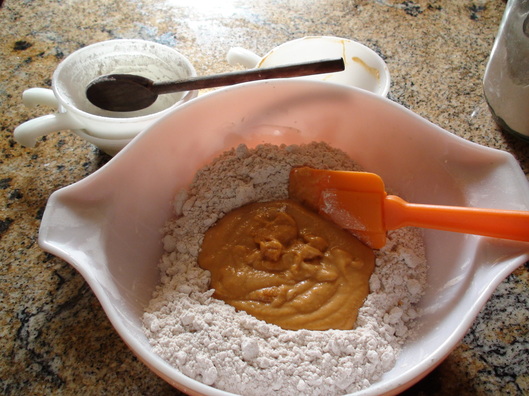
Beat cake mix, Jello, oil, water and eggs for 5 minutes with mixer or until cake mix changes color.    Pour the mixture into the a bundt pan that has been sprayed with Bakers Joy or has been grease and floured. Bake until a toothpick comes out clean and the cake is beginning to pull away from the sides of the pan, about
35-45 minutes. Let the cake cool in the pan for 10 minutes then transfer to a wire rack to cool completely.  You can drizzle a glaze over the top
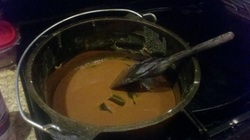
Glaze

1 cup confectioner's sugar
3 tablespoons lemon juice or water
1 teaspoon grated lemon peel

In a small bowl combine  ingredients; drizzle over warm cake.

0 Comments

Peanut Butter Marshmallow Toast

12/11/2014

0 Comments

 
Picture
I started baby sitting when I was 13, Loved it!! My parents would drive me to the parents home until I could drive at 15. When I could drive I would go to theirs houses in the summer and keep the kids while they were out of school. I would have to be there early to fix breakfast. One day I get there and there is the smell of peanut butter in the air. Their Mom had gotten up early and fixed Peanut Butter Marshmallow toast. I had never heard of it before that time. Our Mom never really bought peanut butter. (I think she didnt buy it because she had to eat it a lot when she was a kid because they were poor. "No kid of mine" type of feeling she had towards it.) So the kids set up at the bar and show me how to fix them. And here is the VERY hard recipe.

2 slices bread
couple tablespoons peanut butter
marshmallows

Spread peanut butter onto slices. If you you use mini marshmallow just scatter them whole over the bread. If regular ones use scissors to cut into 3 pieces. Place these on top of the peanut butter and place on a cookie sheet and place in toaster over on broil. Watch closely as they can burn easily and cook until tops are golden. Serve warm. 


0 Comments

Beignets are on the menu

12/9/2014

0 Comments

 
Made these yesterday for my girlfriend Sherry & I. We had cafe' au lait and these light & fluffy beignets. Despite what people may think making beignets are not hard to make. The hardest thing to do is wait. So give this recipe a try.
Picture

1 Envelope Active Dry Yeast
3/4 Cup Water (110 degrees F)
1/4 Cup Granulated Sugar
1/2 tsp Salt
1 Beaten Egg
1/2 Cup Evaporated Milk
3 1/2 – 3 3/4 Cups A.P. Flour
1/8 Cup Shortening
Vegetable Oil for Frying
Powdered Sugar in a shaker or sifter

Combine the Yeast, Water, and Sugar in a small dish. While yeast mixture is setting for 10 minutes and starts to foam, place beaten egg, salt and evaporated milk in large bowl or stand mixer. Beat these ingredients until combined.  Place dough hook on mixer. You can do this all by hand if you don't have a stand mixer.   When yeast has become frothy, about 5 -10  minutes,  add  to the egg mixture. Mix on low speed,  add half of the flour until it starts to come together at this point add the shortening. When the shortening is blended in add the remaining flour, a little at a time until dough is just slightly  sticky. Place dough on a floured surface. Knead the dough adding just enough flour as necessary to make a non-sticky, smooth dough. Place the dough into a large bowl, loosely cover and let rise in a warm area.

After the dough has doubled in size, place it onto a floured surface and roll out into a rectangle that is about 1/2″ thick. With a  sharp knife cut into squares or "fingers"  Let those rise for 40 minutes in a warm place, Can be placed in a barely warm oven. I usually can't wait and fry them them BUT if you can wait they will be more airy.

When the Beignets have risen, I use a Fry Daddy to cook mine but you can heat 2-3 inches of vegetable oil in a large saucepan to 350-360 degrees. Place 2-3 Beignets into the hot oil at a time, being careful not to crowed them or  deflate them. I turn them after just a few seconds so that the will stay if you wait too long they tend to want to stay on one side. When they are golden brown on one side turn them over until golden brown on the other side. They cook fairly quickly so don't walk away.  Remove and place on paper towel lined plates to drain. While hot  sprinkled with plenty of powdered sugar. You have to serve them with with Cafe au Lait. (Will share in another post)
0 Comments

How to make a Roux

11/27/2014

0 Comments

 
Today I'm going to give you pic's and instruction on how to make a roux used in many southern recipes one of them being Gumbo. First you need a cast iron skillet for best results or a very heavy skillet. 5 tablespoons of bacon fat or oil. I prefer bacon grease. 8 tablespoons flour. I also prefer a gas stove. I is easier to regulate your flame. I start out with a high heat until the flour mixture starts to bubble, then turn my flame down to 4 (2 & lo being the lowest below 4) You will need to stir the mixture every minute or so at this point when you start to get a change in the color to a light tan you can now turn the flame down to 2. At this point do not step away from the skillet. you will need to stir the skillet every 30 seconds or so. It will take you nearly 25 minutes to make a roux so I recommend making multiple batches. When the roux becomes dark and about the color of a pecan or Nutella spread you have reached perfection.

Picture
Step 1 Combine 1 part grease and 2 parts flour.

Picture
Step 2 Cook on med heat until bubbles appear then turn heat down to medium/low.

Picture
Step 3 Turn temp down to 2/lo at the point roux begin to turn brown. DON'T leave from this point on.

Picture
Step 4 Stir constantly.

Picture
Step 5 When it reaches the color of a pecan or chocolate you are done. It will get darker as it cools. Store in a jar in the frig and you can scoop out what you need.

0 Comments

Chocolate Drizzled Pumpkin Scones

11/19/2014

0 Comments

 
Picture
1 ½ cup All purpose flour
½ cup Cake flour
2 Tbsp. sugar
1 tsp. baking powder
1 tsp. baking soda
1/2 tsp. salt
2 tsp. pumpkin pie spice
6 Tbsp. butter
4 oz. cream cheese
1 Tbsp. lemon juice & enough evaporated milk to make 1/3 cup   
½ cup pumpkin puree
¼ Cup maple syrup
1 tsp. vanilla

Chocolate Drizzle
4 oz chocolate chips
  ¼ cup of heavy whipping cream
1 Tbsp. of butter

Picture
Fall is my favorite time of year! I love the leaves changing, the site of pumpkins in the field getting ripe & smell of things baking in the oven. So here is a recipe that rolls everything into one. 

Picture
1)      Cut the butter into small pieces and chill in freezer.
2)      Cut the cream cheese into small cubes and chill in freezer with the butter. You want the cheese to be slightly frozen.


Picture
3)      Mix together the pumpkin, milk, syrup and vanilla until well blended and then also chill in freezer.

Picture
Picture
Picture
3)      Mix together the pumpkin, milk, syrup and vanilla until well blended and then also chill in freezer.

Picture
5)      Preheat oven to 375°
6)      Retrieve the butter and blend it into the flour mixture with a pastry blender or 2 knives done in a scissor action. This mixture should look like coarse crumbs.
7)      Now do the same with the cream cheese, only less vigorously. You want to see the cream cheese chunks left in the flour. Do not pulverize them. (I did put the flour mixture back in the freezer for a few minutes so the butter could get hard again.)

3)      Mix together the pumpkin, milk, syrup and vanilla until well blended and then also chill in freezer.
8)      Add the pumpkin milk mixture to the flour and mix just until the dough comes together. Do not over mix.
Picture
9)      Turn dough out onto a lightly floured surface, knead a few times. Dough will be very sticky.

Picture
10)   Place dough on a cookie sheet and form into a flat circle about 1.5″ thick and 7″- 8″ round.
Picture
11)   Now cut this circle into 8 pie slices . I like soft edges and so I leave the dough together. If you like crunchy edges place wedges on a cookie sheet with wedges about 1″ apart.
12)   Bake at 375° for approx 15 minutes or until golden brown.
13)   Remove from oven and let cool.

Picture
Picture
Chocolate Drizzle

While the scones are cooling pour 4 oz chocolate chips into a glass cup. Heat cream to a boil. Pour cream over the chocolate and slowly stir until blended. Add one T of butter and stir till smooth. Drizzle over scones.

0 Comments

Zucchini Banana Blueberry Bread 

11/17/2014

0 Comments

 
Picture
This is one of the few recipes that I didn't change anything EXCEPT add 1 cup blueberries. The recipe is from Taste of Home Special 2011 Collectors Edition. I had blueberries that I picked locally and froze. I think the frozen berries add an extra moisture to the bread.
1 1/2 cups flour
1 cup sugar
1 tsp cinnamon
1/2 tsp baking powder
1/2 tsp baking soda
1/2 tsp salt
1 egg
1 cup mashed ripe bananas (2-3 depending on size)
1/2 cup canola oil
1/2 tsp banana exact ( if you don't have just use 1 tsp vanilla)
1/2 tsp vanilla
1 cup shredded zucchini
1/2 cup chopped walnuts
1 cup frozen blueberries


In a large bowl, add the dry ingredients and stir to combine these ingredients. In another bowl add and mix the egg, bananas, extracts and combine this into the dry ingredients. Mix just until moistened. Fold in the zucchini, blueberries and walnuts. Bake at 325 degrees for about 40-50 minutes depending on the size bread pan you use. I always keep checking at the end. Cool in pan for 10 minutes before removing to a cake rack.

0 Comments

Raspberry Pepper Jelly

7/30/2014

0 Comments

 
Picture
Picture
My backyard is filled with wild black raspberries vines. So I have spent the last few days picking berries. The first batch went into a rhubarb berry pie that I will post in the next day or two. The second batch went for this pepper jelly. So of course I am having to share it will y'all, my friends.  Now after you make the jelly made you can use if for a great party appetizer.  All you need is a brick of cream cheese and take 4 ozs of the jelly and spoon over the top of the cream cheese. Serve with crackers. I like the pretzel type chips. The combo of the sweet, sour & salty is awesome. I hope you enjoy the recipe and share it with your friends.
Picture
  • 1 1/2 cup chopped colored bell pepper
  • ( I used 1/2 cup fresh orange, red & yellow AND 1/2 cup of my own dehydrated green peppers)
  • 1/2 cup chopped fresh hot green pepper, such as jalapeno or Serrano
  • 1 heaping cup black raspberries
  • 3 1/2 cups vinegar
  • 12 cups sugar (I used 6 cups Splenda 6 cups sugar)
  • 2 pkg RealFruit Liquid Pectin
  • 4 drops green food coloring (optional)
1.)First wash 22-24 4oz jars, lids and bands in hot soapy water. Prepare Large pot or canner with boiling water. Place jars in simmering water until ready to use. Do not boil. Place a pot that can hold lids and bands to heat them put to place on jars. Leave them simmering until ready.
Picture
1.)Combine all peppers in a large pot along with 1 1/2 cup vinegar and set aside. 

Picture
2.)In a smaller pot place berries & 1 1/2 cup vinegar, bring berries to a simmer and cook for 15 minutes to bring out all the juices of the berries. 

Picture
3.)Pour berries in to a strainer and press berries to remove seeds.

Picture
4.)Pour the remaining 1/2 cup of vinegar over pulp to get the remaining juices.

Picture
5.)Place juice and pulp into large pot with peppers.   Open pectin and set aside.

Picture
6.) And Sugar and Splenda to pepper mixture.

Picture
7.)Bring mixture to a full rolling boil that cannot be stirred down over high heat, stirring constantly.


When it has reached the rolling boil gradually stir in both packages of pectin.


Picture
Return mixture to a full rolling boil. boil for 1  minute, stirring constantly. Remove from heat. Skim foam if necessary.

Picture
8.)Fill jars leaving 1/4" head space. Wipe off top edge of jars and place lid and band on jar and hand tighten.

Picture
8.)Fill jars leaving 1/4" head space. Wipe off top edge of jars and place lid and band on jar and hand tighten.

Picture
10.)Remove jars and cool. Check seal after 24 hours. Lid should not flex up and down when center is pressed.

0 Comments

Old Recipe boxes & Recipes: Snow Cake

3/9/2014

0 Comments

 
Picture
I LOVE old recipes and recipe boxes.  I have been collecting cookbooks since I was a kid and then started collecting old recipe cards and newspaper clippings when my kids were young. I have a ton of these and I think I will start posting some of them and then cooking recipe as well. Our first will be the first one in the box I found at an Estate Sale a couple weeks ago here in Northern Indiana along with a 1940's Kitchen-Aid Mixer. (Which I'll post later)

Picture

1 Box Jiffy Cake Mix (White or Yellow)
Mix as directed on box and add:
{1/4 cup cooking oil
{1/4 pkg. Instant Vanilla Pudding

Bake in 13x9 pan at 350 degrees 20-25 min. Cool

Blend rest of pkg instant pudding
plus 1 more of pkg Instant pudding
with {2 cups milk
          {1 Tbls. vanilla
          {1 8oz pkg Phil Cream Cheese

Spread this over cool cake.

Drain 20 oz can crushed pineapple
Spread over pudding. Top
with 8 oz
Cool-Whip. Garnish with chopped nuts

0 Comments

What Happened?? Easy Cobbler

11/17/2013

0 Comments

 
Picture
Put a blog on here yesterday before leaving for Chicago for the casting call and it has disappeared. I shared the recipe that my Mom used to make alot when I was a kid. Easy Fruit Cobbler. Since it didn't seem to post I guess I will bake on today and post it here for all to see. With the smell of a pork roast in the oven and Hubby watching a "Man" movie upstairs I set here reminiscing with friends and their special "food" memories and waiting for the phone to ring to tell me "You've made it" So when the phone rang a few minutes ago I JUMPED and RAN to get it. Too bad it was just CVS calling to tell me my allergy meds are ready LOL. So make you own food memory today with you family and try this easy cobble that I know even my Grandmaw Achord made. You can substitute fresh apples that have been cooked down with a little butter and sugar for the canned fruit.


Easy Fruit Cobbler

1 can pie filling
1 stick melted butter
1 cup sugar
1 cup all purpose flour
1 cup milk
1 tsp vanilla

    Preheat oven to 350 degrees. Place a enough butter in a 9x9 baking dish to coat bottom and sides. Place fruit in pan. Place remaining ingredients in a medium bowl and add remaining butter and combine until blended. Pour batter over fruit and place in oven on middle rack and bake for 30-45 minutes depending on oven. Serve with half & half or vanilla ice cream.
0 Comments

Crescent Roll Sandwiches

10/19/2013

0 Comments

 
Picture

Picture
Picture
Picture
4 tbl melted butter
1/2 tsp garlic
1 pkg crescent rolls
3 slices ham
Cheddar cheese
  • Roll ham around cheese and place on wide end of crescent placing a little away from edge.
  • Roll Crescent 1 time and press the edge down to itself.
  • Roll a 2nd time and press outside edges to themselves.

Picture
  • Roll over again and flip sides to the top side of crescent and press into itself. Wrap tail over top of crescent and press the tip into the crescent lightly.
  • Place garlic into melted butter. You can omit the garlic it you would like to. Place bundle in butter and roll. Place in pan and bake at the temperature and time on the package.
Picture
  • Now ENJOY with a cup of coffee.
  • 0 Comments
    <<Previous
    Forward>>

      Archives

      September 2017
      January 2016
      December 2015
      October 2015
      August 2015
      July 2015
      June 2015
      May 2015
      April 2015
      March 2015
      February 2015
      January 2015
      December 2014
      November 2014
      October 2014
      August 2014
      July 2014
      May 2014
      April 2014
      March 2014
      February 2014
      November 2013
      October 2013
      July 2013
      January 2013
      December 2012
      March 2012
      February 2012
      December 2011

      Author

      My name is Stephanie Thomas. I am a Louisiana girl who has transplanted to Indiana. I LOVE to cook, take photos, raise chickens, ride motorcycles, a quilter and did I mention cook?  I have cooked in my friends cafe's and for church events.  I have a 20 gallon pot of jambalaya that I have used to cook for our party that we have every year for our friends. I enjoy cooking for our family and friends.

      Categories

      All
      Breads
      Breakfast
      Cakes
      Canning
      Casserole
      Crafting
      Desserts
      Dips & Spreads
      Entree
      Just Me
      Meal In It Self
      Mexican
      Old Recipes Card Or Clippings
      Pies
      Quilt Square
      Recipes
      Sandwickes
      Sewing
      Smart Tips
      Snack
      Soup

    Powered by Create your own unique website with customizable templates.
    • Home
    • Family Photo's
    • Blog
    • Contact
    • Photos of Friends
    • Recipes
    • Misc Photo's